The Beginner's Guide to Drone Photography in Dubai | Part 1
Learn essential tips and legal requirements for starting out in drone photography in Dubai.
By Sheban Naim
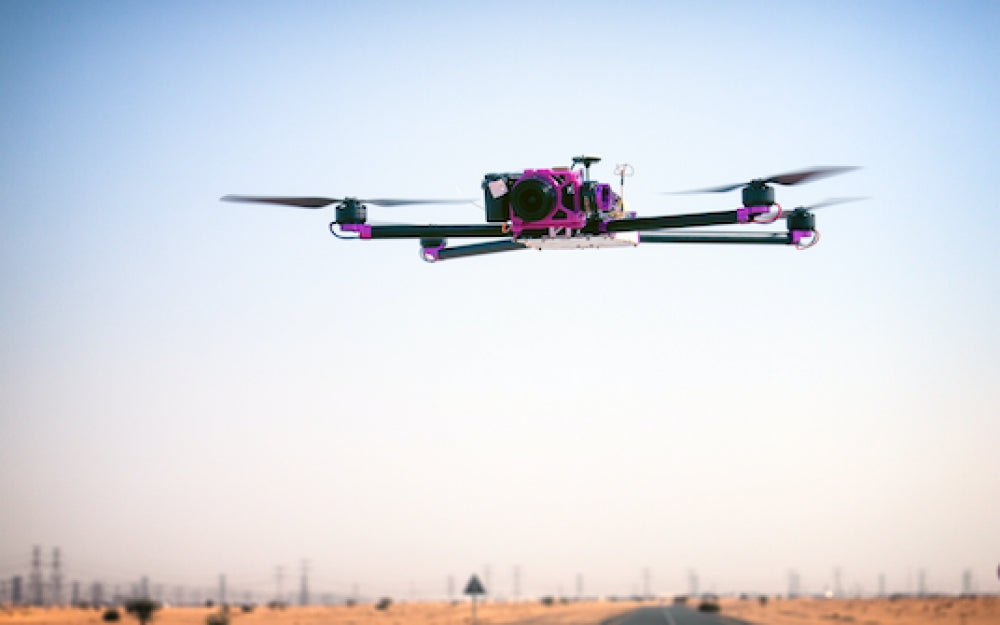
As drone usage continues to grow across the world, Dubai in particular has seen a marked increase in drone sales and operations - both commercially as well as by hobbyists. This also includes budding photographers who have acquired a drone recently and want to use it to create content from an elevated perspective. However, it is easy to forget that by law, a “consumer drone” is classifed as an “Unmanned Aerial Vehicle” by the authorities and in light of recent closures at Dubai Airport, strict rules have been put in place governing drone use. As a consequence - operating a drone in UAE airspace can get complicated.
I’ve been a Commercial Drone Operator for the past 4 years, and in this two part series I share some of my insights into drone operations, tips for getting better drone shots and explore some of the rules and regulations surrounding drone flying in Dubai and the UAE.
Let’s talk photography first - it’s probably the primary reason you’ve acquired a drone to begin with. But before we get started, it would be wise to mention the rules in brief:
- All Drones (Hobbyist or Commercial) require registration with DCAA (Dubai) or GCAA (AD & other emirates) depending on your emirate.
- Registration cannot be completed without a recognized training certificate
- Once the process is complete you will receive a registration card that you must keep with you during flights
- The registration process can change and differs from Emirate to Emirate (as of the writing of this article)
GPP Disclaimer: We will discuss the regulations in more detail in The Beginner's Guide to Drone Photography in Dubai | Part 2, but please note that this article focuses on the creative aspect of drone photography. It is always the responsibility of the operator to ensure all local regulations are followed in accordance with Dubai and UAE law.
TOP 6 DRONE PHOTOGRAPHY TIPS
1. Practice with a smaller “toy” drone first.
Okay, so this isn’t really a photography tip. Here’s why this is important. As a photographer, you’ll want to focus on “getting the shot” - that means composing your shot, F-stop selections and fiddling with ISO or shutter speeds. It’s easy to forget that you’ll be in command of a UAV at the same time. So flying and controlling a drone needs to be second nature to you. Practicing with a smaller quadcopter will allow you to get the skills you need to fly in and out of tricky situations and may one day save your primary drone from a crash. Being a good pilot is just as important as being a great photographer.
2. Try to get “depth” in your shots.
A common mistake made by beginner drone photographers is “flat” looking photographs. These are shots that don’t really seem interesting as nothing “pops” out at you, even if your subject matter is interesting. The key to that “pop” is getting the right shadows in your shot. Shadows add depth and give the viewer a sense of how tall or large something is on the ground. In other words, don’t fly when the sun is too high - wait till your subject is lit properly. It seems obvious, but getting the right shadows is tricky, too much shadowing and you lose detail - too little and you risk a flat looking image.
Shadows give the sand a texture and most importantly, make the Arabian Oryx stand out. This was shot with a Sony NEX-7 at ISO 400, f/5.6, at a fairly low altitude. Image was then cropped around the Oryx to take advantage of the 20MP sensor & show more detail.
3. Leverage geometry and colors.

Part of the charm and uniqueness of drone photography is the ability to see all aspects of an object, in one shot. A flat looking rectangular building could be semi-circular or have a pool and some great landscaping hidden on the other side. A boring park bench could be situated in the middle of carefully placed pathways that creates interesting shapes and color contrasts. A lot of architects and planners build large urban designs into their plans, some of which are only viewable from the air. Use that to your advantage - learn to think vertical and compose your shots. I sometimes use Google Earth to pre-scope out areas that may have such features.
4. Double-check your focus.
This is one of those points that is overlooked even by pro photographers on occasion. Part of the reason is the nature of drone flight - a pilot/photographer has to keep track of battery levels, radio range, orientation & surroundings. There is a lot going on at any moment and checking to ensure your lens is set to focus properly can be easily overlooked. Remember, Drones don’t have optical or digital viewfinders - just a large iPad or a low-res LCD FPV screen (depending on the type of Drone you are piloting), so a shot may look great on screen, but may not be tack-sharp when you go over it in post. This isn’t a major issue for DJI drones, as most of them have fixed lenses and apertures and focus peaking - but focus does come into play when flying regular cameras mounted on drones (a 5DMkIII on an S1000 for example). Also of note is that as of the writing of this article, some DJI drones have a “tap to focus” feature that requires attention and can result in out of focus shots in certain conditions (the Mavic and Phantom 4 Pro). Bottom line - find out the focus behaviour of your particular drone system and remember to set it accordingly before every flight.
5. Watch those drone shadows.
Another easily avoided rookie mistake is capturing your drone’s shadow in your final image. Yes, this can be fixed in post if you’re a pro-photographer, and in some conditions a shadow is unavoidable. But try and make it a habit to angle the camera so you don’t capture your drone’s shadow in your shot. This becomes an especially important skill if you are planning on shooting commercially down the line.
6. Change altitudes and angles.
A lot of new pilots have a tendency take the drone out to a certain altitude and stay there. It’s easy to forget you have a tripod in the sky that can move in a 3D space- so always remember to vary your altitude and try the same shot. This is especially useful with lower resolution cameras where cropping in post will produce a blurry image. There are times when you may find you need to “zoom” onto a subject but run into pixelation when cropping because the drone was too high. Alternatively, going higher gives you the option of capturing the features around your subject and gives you a wider field of view. Just remember, according to UAE Law, you cannot fly above 400ft AGL. However, 400ft is plenty as you can see from the images below.
The above 20MP images were shot at 30m, 50m and 100m and allow various fields of view of the same subject (the helipad).
Drone photography is a complicated subject - but like all creative endeavors, the only way to get better is to shoot more. In the words of Henri Cartier-Bresson, “Your first 10,000 photographs are your worst.” Thankfully, in the digital age, you can get a do-over at the touch of a button.
Read Part 2 here.
Guest post by Sheban Naim, a Dubai-based drone specialist. Sheban is one of the masterminds behind Airspectiv, a professional aerial photography and video production company in the UAE (follow on Facebook, Instagram, and Twitter). Learn more at airspectiv.com.